
Unfortunately, compression, the most popular form of dynamic signal processing, is probably one of the most perplexing and abused or misused tools in audio. In this article, we’re going to get down in the weeds and discuss audio compression, what it is and its practical applications, so that you can approach your mixing with more knowledge in hand.
What Is An Audio Compressor?
To start, you must understand that compression falls under the umbrella of dynamic signal processing. Dynamic signal processing is intended to help automate gain changes to reduce the range between loud and soft signals. Essentially, a compressor can be used to raise the volume of a low signal, reduce peaks in the loud signal, change the attack or sustain of a signal, and much more!
There are 4 basic types of dynamic processing that we as mix engineers use:
Expansion
The softer a signal entering an expander, the softer it will be as it is played back. Essentially, an expansion makes soft signals even softer. You set a threshold at a chosen level, and any signal that doesn’t go over the threshold is made softer. This is great for suppressing noise or microphone bleed. (https://theproaudiofiles.com/dynamics-processing/)
Limiting
Limiting is essentially an extreme form of compression that stops a signal from going above the threshold at all.
They help to prevent distortion from random peaks and are great for using at the end of a master bus chain.
Gating
Gating is similar to expansion, though a bit more extreme. Any sound that does not exceed the threshold of a gate will be completely muted.
Gates are perfect for stopping an amp from humming when the guitar isn’t playing or cutting any room noise when a singer isn’t singing.
Compression
Finally, we have compression, the most common and flexible of the dynamic applications. In a nutshell, compression is used to even out the volume in a passage of music so that the dynamic range is more consistent. Any signal that exceeds the set threshold will be turned down to match the quieter sounds.
What Compression Does To A Sound Signal
Dynamic Range
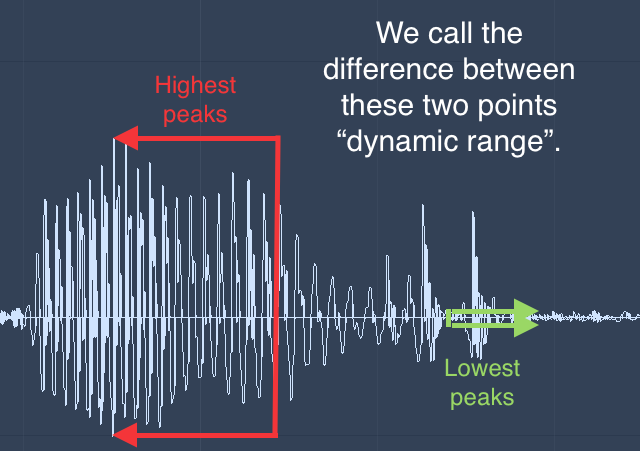
To begin understanding what compression actually does to an audio signal, you must first understand that every signal has what we call a dynamic range. When we talk about a dynamic range in the realm of audio, we’re talking about the ratio of the loudest peaks (non-distorted) to the noise floor (softest sound).
The ratio of a dynamic range is measured in Decibels or “dB” for short. To give you a reference, the dynamic range of the human ear, meaning the difference between the loudest sounds we can perceive and the quietest, is 120dB.
Compression is made to reduce that dynamic range. So the question you might be asking now is, “Why in the world would you want to reduce the dynamic range of a signal?” Well, as much as we love dynamics in music, as they provide motion and emotion, there are some signals with transients that are either too soft or too loud compared to the rest of the signal.
How Does Audio Compression Decrease That Dynamic Range?
Compressors actually work in two ways: upwards and downwards.
Upwards Compression will take the volume of the softer parts of the signal that don’t reach the threshold and boost them so that they are closer to the louder parts.
An excellent example of this is a drum room microphone that may be capturing a lot of the cymbals, but not enough of the snare. Upwards compression can bring that soft snare sound up so that the entirety of the drum room microphone signal is more even.
Downwards Compression, on the other hand, helps to attenuate the peaks of a signal that goes above the threshold, bringing them closer to the softer parts.
A great example of this is a singer who may hit a large vowel that is way louder than all of the others in his or her song. Downwards compression can attenuate the vowel to make the signal more even.
Why Do Mix Engineers Use Compression?
As a consequence, compression helps to make a signal sit better within a mix. For example, most all mixing engineers will compress a vocal so that you can hear the quiet lines or subtle nuances, all while making sure the more prominent lines don’t pop out.
Compression can also be used as an effect. It’s not uncommon for specific signals to be overridden with compression for that sweet pumping effect, parallel compressed to give your mix more beef, etc. Compressing can be used to provide a kick drum more punch and power, a vocal more full, or a guitar more in your face. We’ll go into some cool little compression tricks later in the article, but first, let’s look at the basic controls of a compressor.
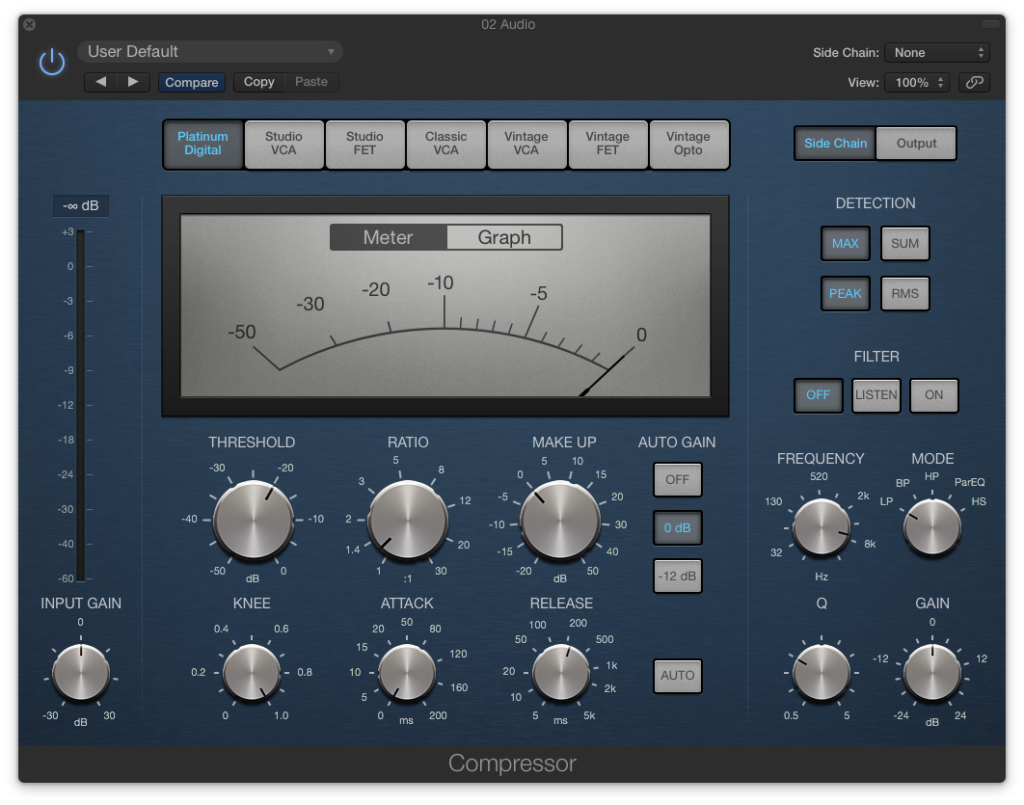
What Are The Controls On A Compressor?

Threshold
The threshold basically states at what point the compressor will begin working. If you set your threshold to -10dB, for example, any part of the signal that moves above -10dB will be compressed.
Attack
The attack of a compressor is set to milliseconds (ms) and will determine exactly how many milliseconds it should wait before compressing the signal.
If you set your compressor with a fast attack, it will begin compressing as soon as your signal passes its threshold. You may use a fast attack on a snare for example, as the transients are much sharper and need quick attenuation.
If you set your compressor with a slow attack, it will begin to ignore the transients, and instead compress the tail end of your signal. If you’re looking to have a punchy bass, for example, you’re better off giving it a slow attack time so that you don’t squash the transients.
Release
The release of a compressor is set in milliseconds (ms) as well and will determine exactly how many milliseconds to compress after the signal falls below the set threshold.
If you set your compressor with a fast release, it will stop compressing as soon as the signal falls below your threshold. This is great for a snare drum or any other sharp transient sound, as you’ll most likely only want to attenuate the peaks.
If you set your compressor with a slow release, it will slowly stop attenuating once the signal falls below the threshold. If you’re dealing with long or sustained signal, such as a cello, a slow release will keep your compression a bit more transparent.
Makeup Gain
Because a compressed signal evens out the dynamic range of a signal, it effectively gives you more headroom overall. Headroom is the dB measurement between the peak of your signal and 0dB, the point where clipping or distortion occurs on a digital system.
Because compression attenuates the peaks of your signal, it turns down the gain, or overall volume, of that signal. Fortunately, compressors come with something known as makeup gain so that you can “make up” for that gain that you just lost with compression.
Slope
Some compressors come with what is known as the slope, also known as the ratio or knee. The slope will determine how aggressively a signal is compressed as it moves above the threshold. Knees are separated into two categories: soft and hard.
Soft Knee
Soft Knee compressors kick in very gently as a signal crosses over the threshold. This gives the compression nice, gentle glue by simply tightening up transients.
Hard Knee
Hard Knee compressors kick in right away to clamp down on the signal as soon as it crosses over the threshold. This attenuates your signal very quickly and squashes any transients.
A Brief History On Audio Compressor Units
Before we continue we would like to give a look into how audio compression became so prevalent. This will help create an even deeper understanding in how we ended up where we are today.
Audio compression was born in the 1930s when the radio industry was booming. Before compressors, engineers at radio stations would manually ride levels to avoid the gain overdriving the equipment and potentially blowing the radio station off the air. The issue was, human engineers could only attenuate signals so quickly, meaning certain surprise transients could come through too fast for them to turn down.
To combat this, engineers created leveling amplifiers to automate the gain process. These worked a bit like limiters, essentially a heavy form of compression.
Iconic Hardware Compressor Modules
One thing that we can all agree on is that there are iconic hardware compressors that have stood the test of time and been used and heralded by the best producers and engineers in the industry and are so good that most software compressors being developed today are modeled after them. Below is a list of some of the most iconic of all-time.
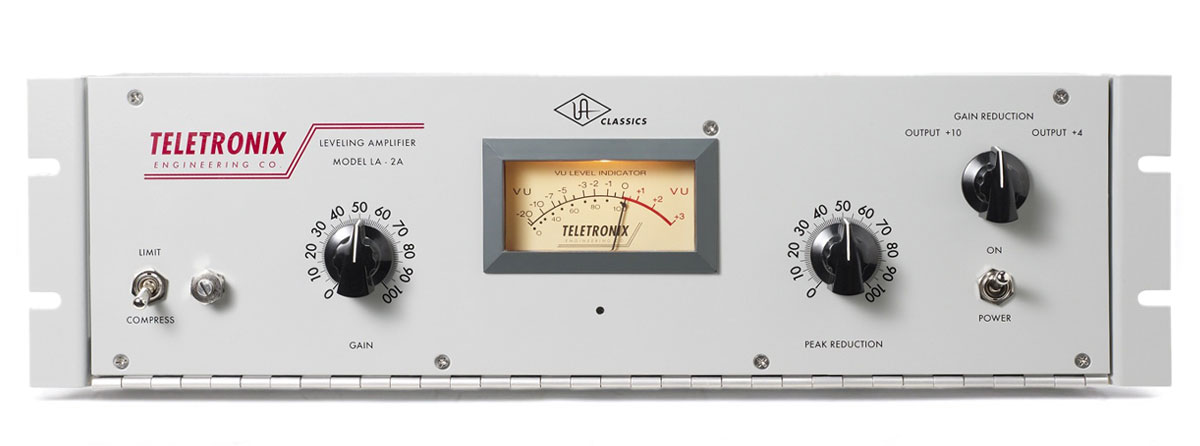
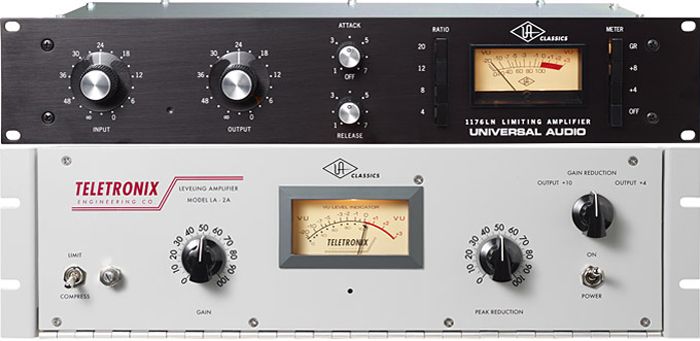
Teletronix LA-2A
The Teletronix LA-2A has been utilized on countless hit records since it was introduced in 1965. Even now you can find a number of plugin emulations for the LA-2a, as well as Universal Audio’s reissue that came about in 2000. Engineers everywhere not only love it for its warmth, simplicity, and optical compression that is unlike any other but for the fact that it is incredibly versatile. Smooth and musical, the LA-2A is no doubt one of the most famous hardware modules in compressor history.
Universal Audio 1176
When Bill Putnam, Universal Audio’s founder, decided to redesign his famous 175 limiter back in 1966, he probably didn’t know that he would create one of the most famous solid-state compressors of all time, the 1176 Peak Limiter. From upfront vocals to rock and roll kicks, the 1176 Peak Limiter has been used on almost everything. Like the LA-2A, there are tons of software companies out there who have developed emulations of it. It is most famously known for its assertive ‘all buttons’ mode that has been used on thousands of hit records since its inception.


Fairchild 670
The Fairchild 670 is the grandfather of all tube-based compressors. With its unique soft-knee compression style, it became immensely popular in mastering applications to help glue mixes together in a silky, smooth manner. At this point, these compressors are actually the most expensive in the world, and also very difficult to maintain because of the valves, though you can also find many emulations of them from companies like Universal Audio and Waves, that do the job just as well.
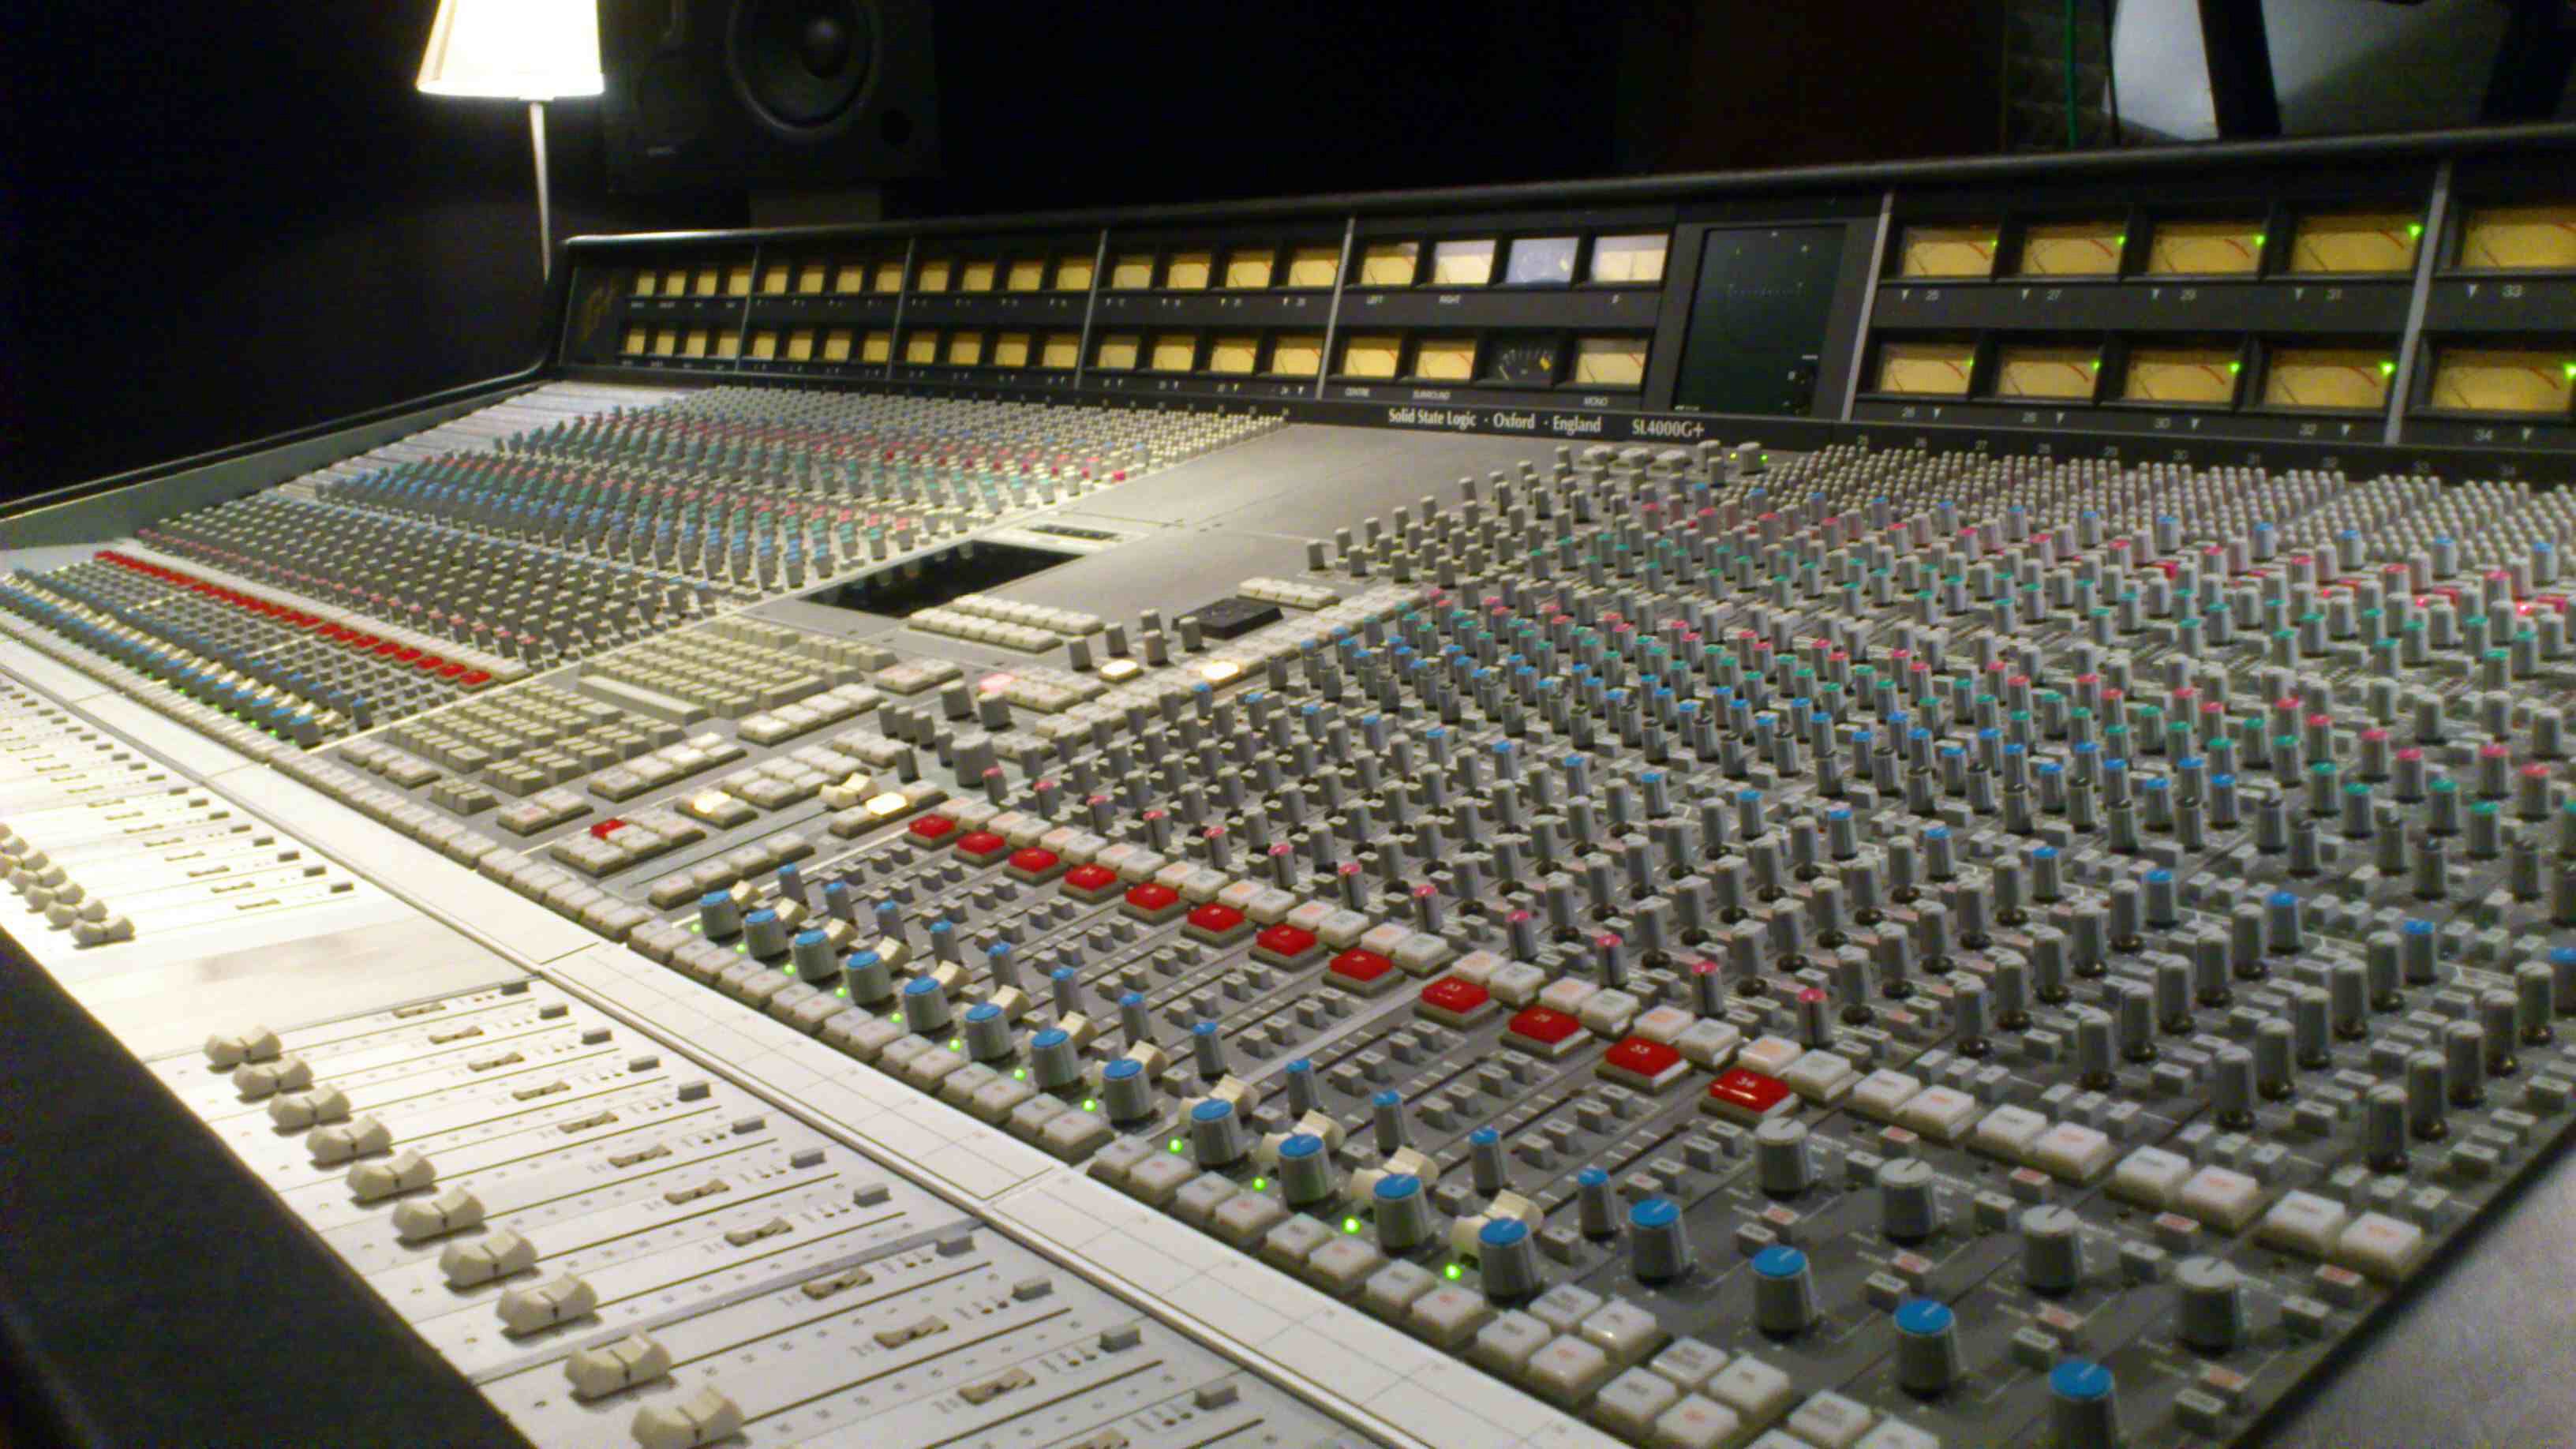
SSL 4000
The SSL 4000 launched an empire the likes of which may never be seen again. This industry icon is actually a mixing console, but the onboard compressors are such an integral part of the overall sound, it has been emulated countless times as well. In the history of music, only one mixing console can claim that more hit albums were recorded using it.
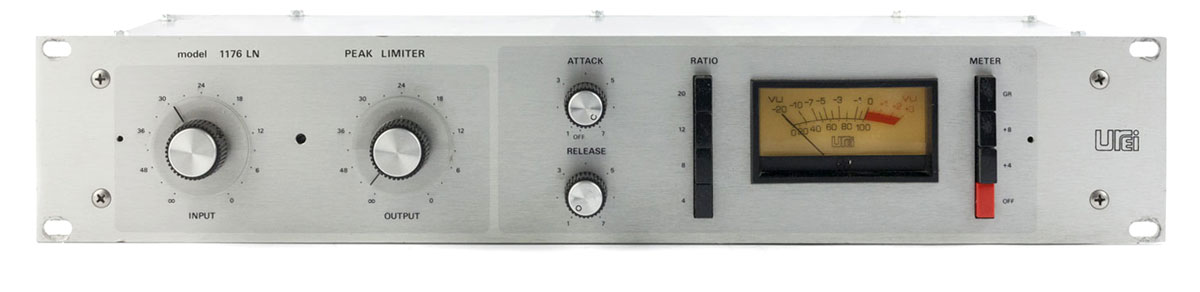
Urei 1176
For over 50 years this beloved compressor has been associated with some of the greatest recordings of all-time. From vintage warmth to all-out aggression, it’s capable of a wide range of output given its limited options. Creator Bill Putnam also founded Universal Audio, one of the most respected names the audio world, for both their hardware and software.
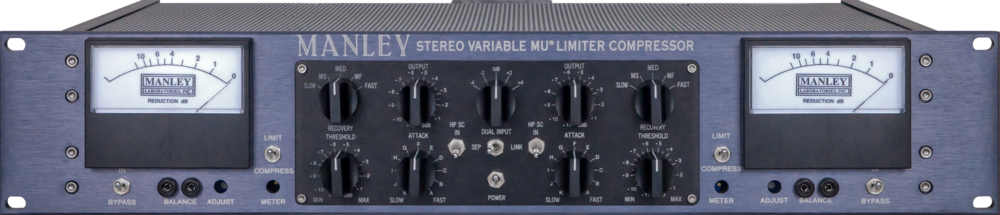
Manley Variable Mu
A slower attack time than many other compressors set this classic up for success and is often compared to another popular choice, the Fairchild 670. It’s used predominantly in mastering, to gel mixes and provide a deep and rich profile with definition.
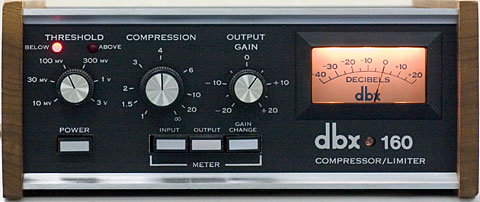
dbx 160
The dbx 160 series claims to be the most used VCA compressor in the world, after having become an industry standard years after the original was introduced in 1971. With a signature hard knee, it is commonly used to add punch to drums and people often times refer to its ‘knock’ quality.
How To Use A Compressor In Your DAW
When people ask where to put a compressor in their mix chain, they are typically referring to whether they should put it before or after equalization. While there is no golden rule, there are advantages and disadvantages to both.
EQ Before Compression
When you place your compressor after your EQ, you are essentially exaggerating any sort equalization that has been applied. This can have negative consequences in that your compressor will now be fighting against changes in your EQ gain, not giving you an accurate, overall compression. On the other hand, if you have a sound with too much gain in a particular frequency range that might skew your compression, such as a vocal with too many lows that’ll hit the compressor harder than the highs, you may want to cut those frequencies before compressing your signal.
Compression Before EQ
Most times, mix engineers will compress before they EQ, as they don’t have to worry about the interaction of the two processes. The disadvantage is the converse of the problem mentioned above. If you want to compress an even signal but the lows are coming in too hot, you’ll most likely get a signal that is unevenly compressed.
Audio Compression Tricks and Tips
As I’ve mentioned already, compressors are very flexible tools and can be used in many different ways. Here are just a few popular tricks to help get you thinking creatively as you learn.
Don’t Over-Compress
It’s easy to over-compress vocals or instruments and completely suck the life out of them. While many modern producers compress the life out of their music to make it loud, the consequence to this is that you kill the dynamic range. Unless your mix needs some sort of extreme compression, try and go subtle at first.
Use Multiple Compressors On A Track
Using one compressor can work well most of the time. The issue is, sometimes you can completely kill your transients without even knowing it if you are relying on one compressor to do all the work. Instead, try using multiple compressors on a vocal for example. Essentially, the first compressor is there to keep peaks in control while the second compressor can help to even out the dynamics.
Sidechaining
Sidechaining is a very popular form of processing in the EDM world, though many mix engineers employ it in other forms of music as well. Essentially, you have what is called a “detector circuit” in line with your attenuator. This detector circuit can react to certain signals to help fire off the compressor when that particular signal is present.
For example, it’s popular in EDM to sidechain the bass to the kick so that it ducks out of the way every time the kick hits. This is a great way to help combat similar frequencies that are fighting to get through.
Parallel Compression
Parallel compression is a very cool technique. In its foundation, you duplicate your signal, compress the bejeezus out of it, and blend it back in with your original signal. Parallel compression is often used on drums and vocals, as it helps them to push through a mix when they can’t seem to do it alone. The best thing about parallel compression is that you can ride your compressed signal up and down throughout a song to give your sound more power during prominent parts.
Best Audio Compressor Plugins
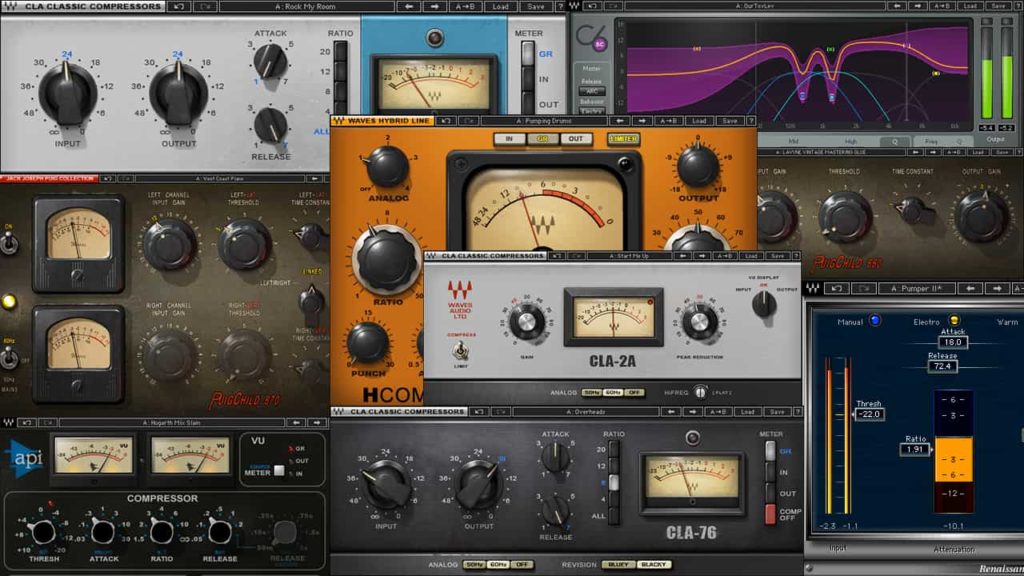
Now that you have a full understanding of audio compression, and a few tips and tricks to employ, we would like to leave you with a list of plugins so that you can apply this knowledge in a real word application.

Universal Audio Teletronix LA-2A
The Telextronix LA-2A from Universal Audio is an incredible emulation of the classic LA-2A. It is incredibly easy to use with only a few parameters and comes with the slow attack and release times built in, perfect for subtle, vintage sounding compression.
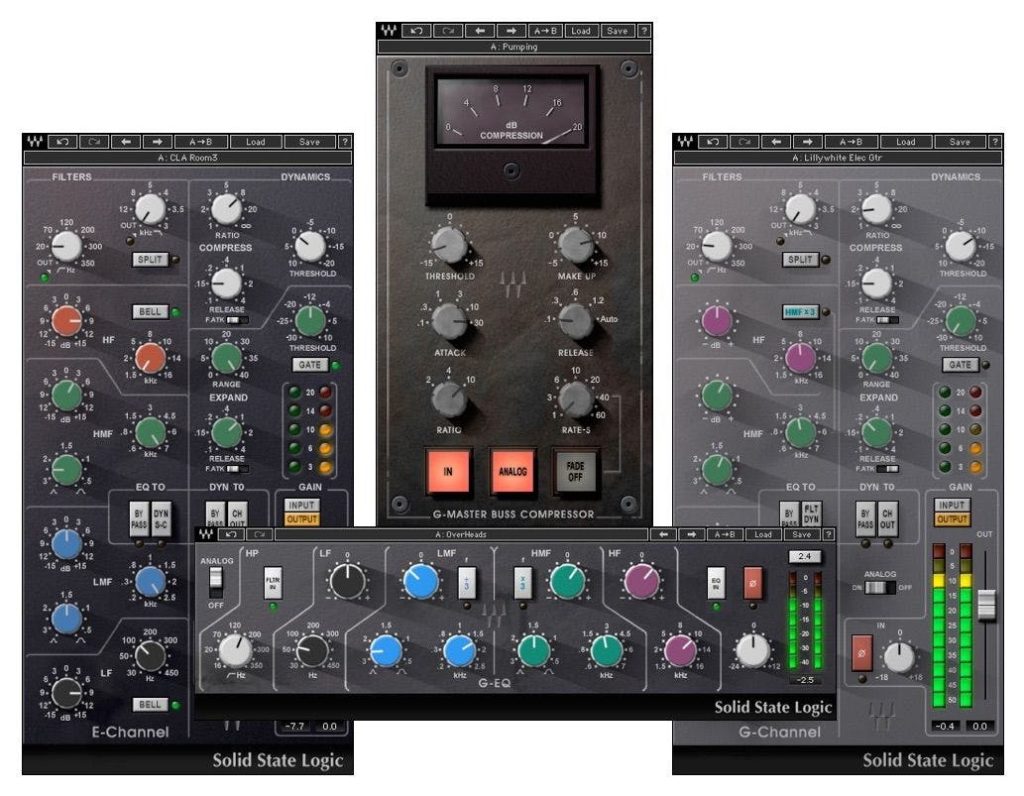
Waves SSL-G Master Buss
Waves created a stunning emulation of the legendary SSL 4000 G Console master buss compressor that is perfect for adding a nice glue to your entire mix. It comes with all your basic parameters and can help to give your mix a solid punch.
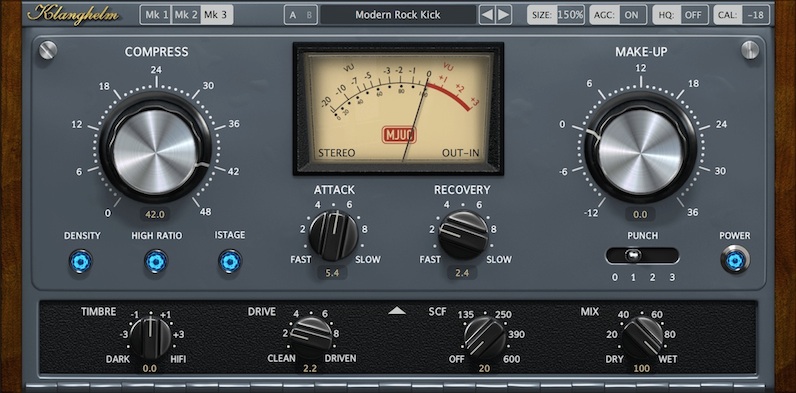
Klanghelm MJUC
This inexpensive variable tube compressor plugin is a 3-in-1 compressor plugin with a variety of parameters pulled from different pieces of hardware. If you’re on a budget and still want a compressor plugin that can add vintage character to your sound, this one is awesome.

Cytomic The Glue
The Cytomic The Glue compressor plugin is an excellent master buss compressor that is very similar to the Waves SSL-G. The difference is that this one was made to replicate mix buss compressors on the 80’s SSL consoles, giving it incredibly fast attack times and edgier coloration.
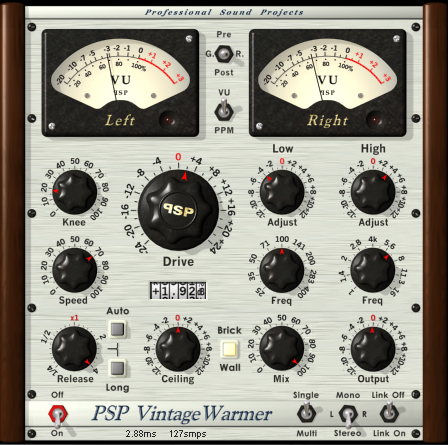
PSP Audioware Vintage Warmer 2
The PSP Vintage Warmer 2 is a mix between a multi-band compressor and a saturator. From mixing to mastering, this plugin can add some serious analog character to your music.
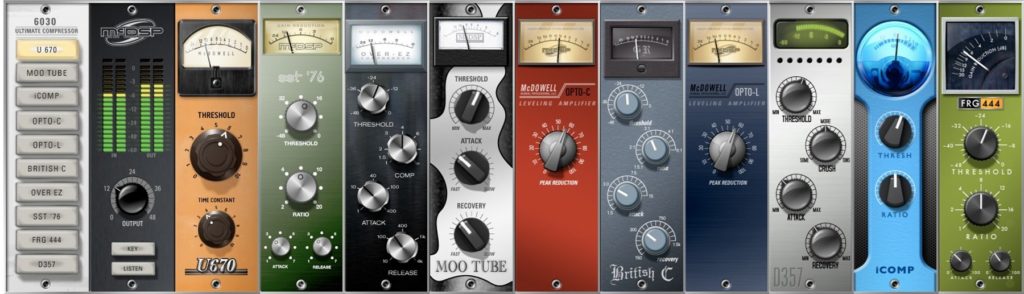
McDSP 6030 Ultimate Compressor
The great thing about the 6030 from McDSP is that it is a large rack of 10 compressors, some emulations of classic hardware, some not. You get solid-state designs and smooth tube designs all in one. Basically, it gives you close to everything to work with.

FabFilter Pro-C 2
If you’re looking for transparency, the FabFilter Pro-C 2 is an excellent choice. You get a variety of compression algorithms and multi-band sidechaining, giving you endless possibilities without coloring your mix.
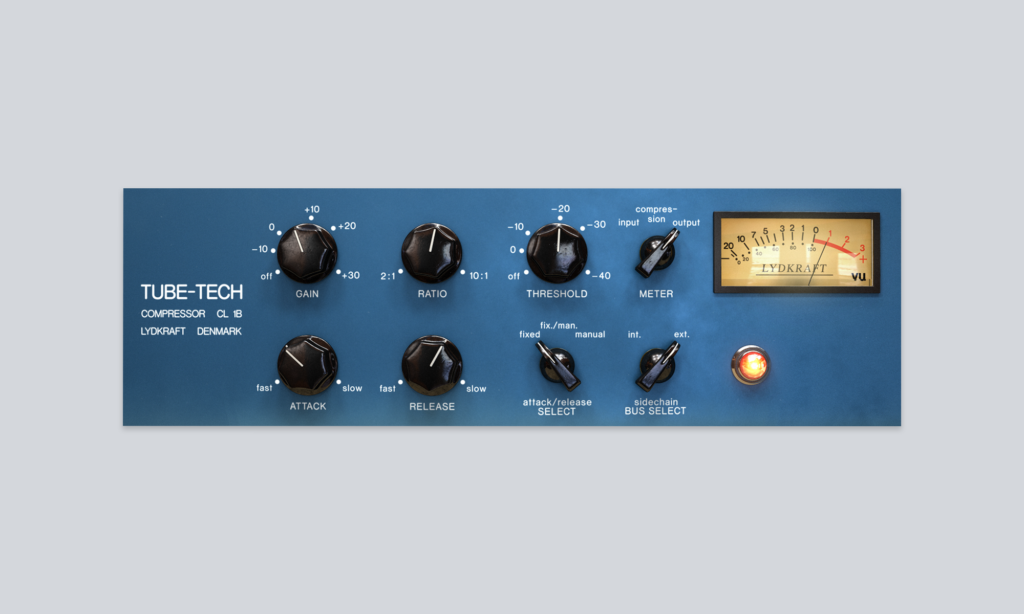
Softube Tube-Tech CL 1B
The Softube Tube-Tech is an emulation of an optical compressor that you can use for both hard and soft compression. The optical gain reduction circuit emulation is what makes the sound of this compressor so unique, and using it on tracks or as a parallel compressor, can add incredible texture to your sound.

Waves Renaissance Compressor
For simplicity, transparency, and light CPU-usage, we recommend the Waves Renaissance Compressor. It can be used in pretty much any context, and it always seems to get the job done.
Conclusion
We could truly go on forever about compression, as it can be applied in a multitude of ways, though for now, we hope you have a fundamental understanding of compressors, how they work, and what they can do for your mix. Once you start to use them and build up confidence in using them, you can move onto to more advanced techniques. Don’t let the mystic properties of compression scare you. Always remember to stay excited about mixing music never shy away from experimentation!


Recent Comments